Installing Public Printer drivers for Windows
Download and Extract Drivers
Drivers are available from:
Add the Printer
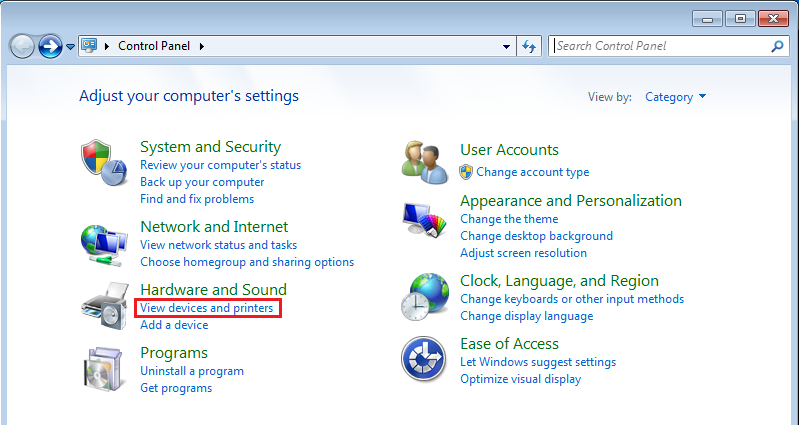
- 1) Open Control Panel and select Devices and Printers
Windows 7:
Category View:
Icon View:
![]()
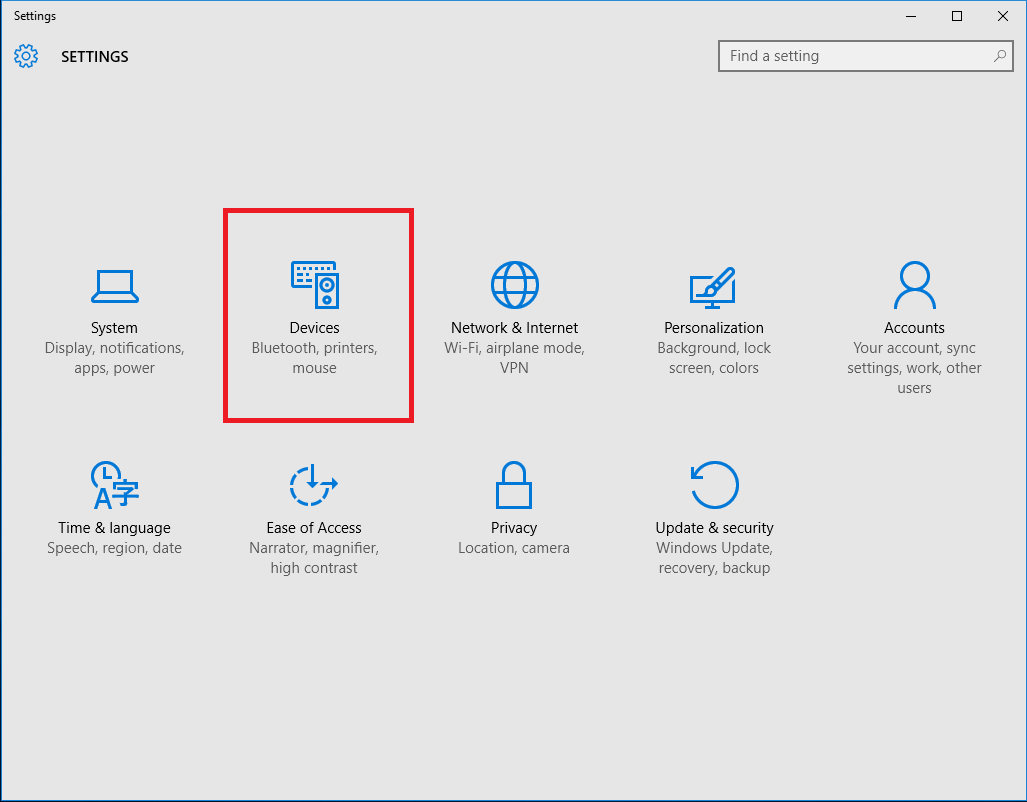
Windows 10:
- Click Windows button at the bottom left corner, and open Settings. Select Devices.
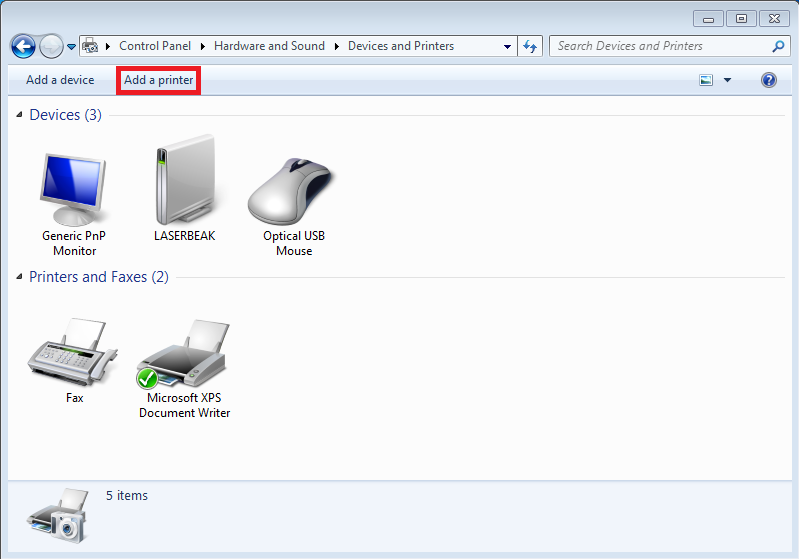
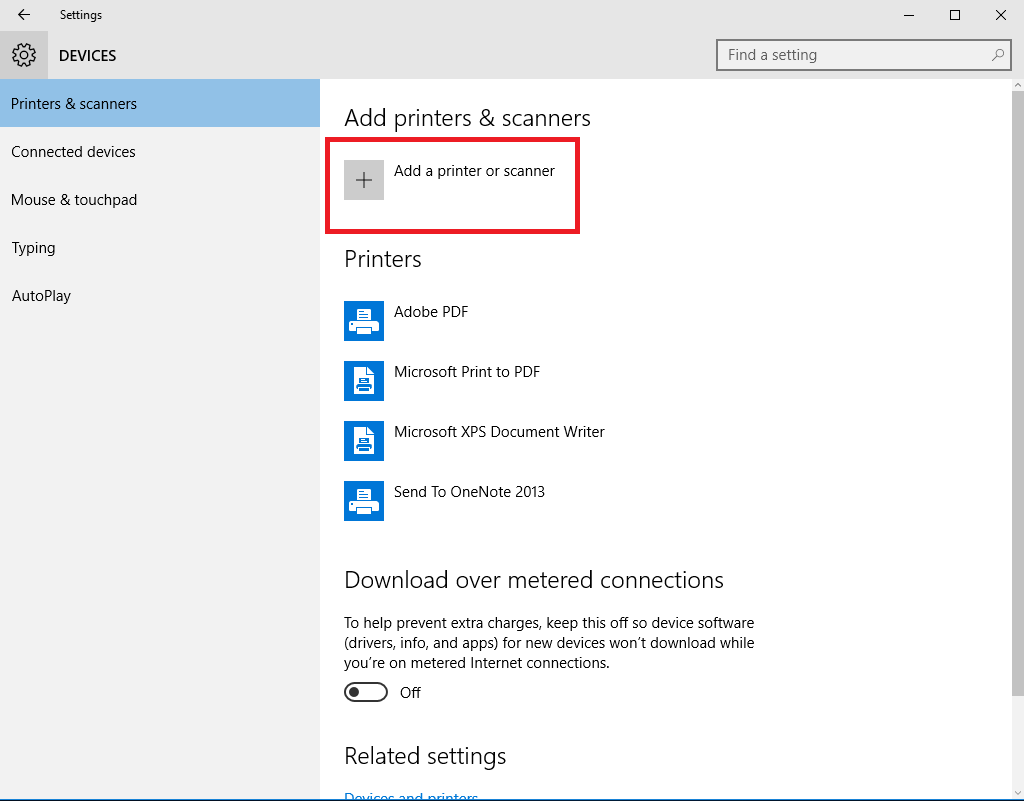
- 2) From the Devices and Printers window, click on Add a printer
Windows 7:
Windows 10:
- 3) The Add Printer window should appear. Choose “Add a network, wireless or Bluetooth printer”
Windows 7 only:

- 4) The next window will try to find the printer. Select “The printer that I want isn’t listed”
On Windows 10:

Note: the following instructions apply to both Windows 7 and later
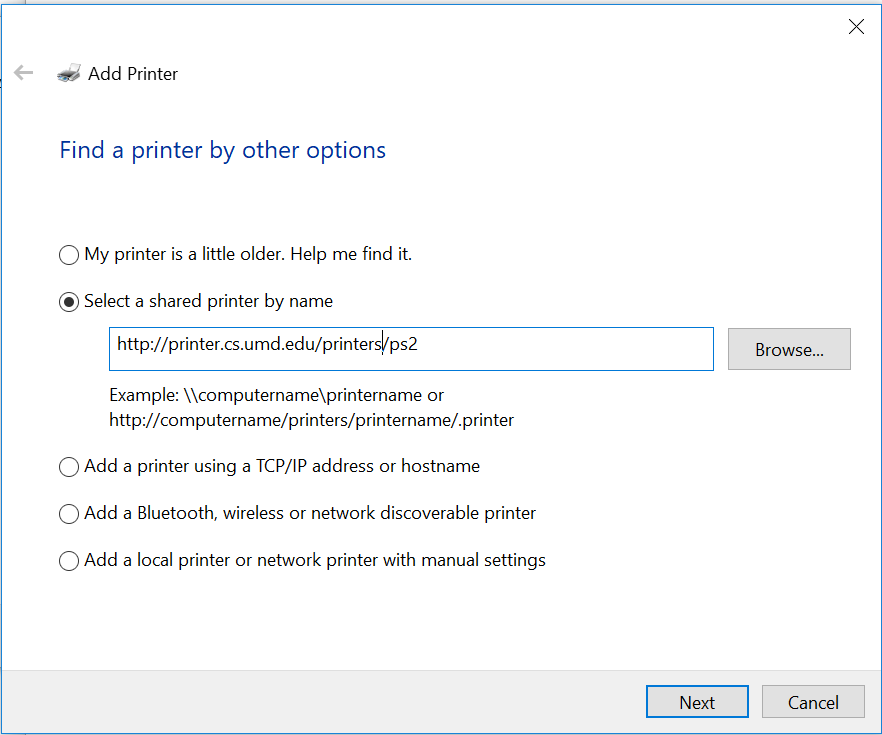
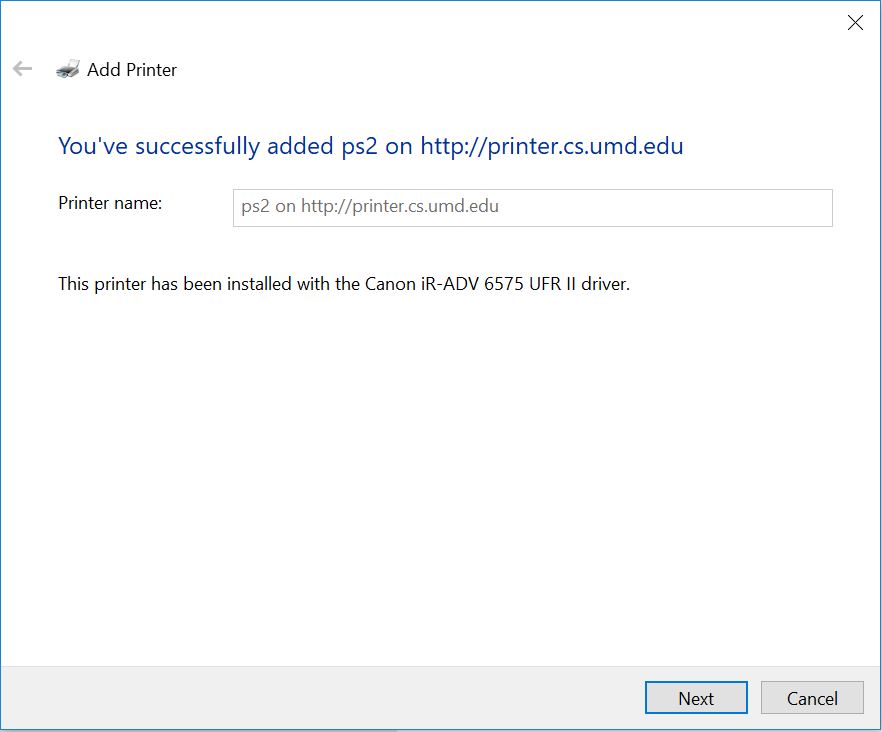
- In this example, we are installing ps2. Replace “ps2” with “ps1” or “ps5” if you want. Choose Select a shared printer by name and enter:
http://printer.cs.umd.edu/printers/ps2
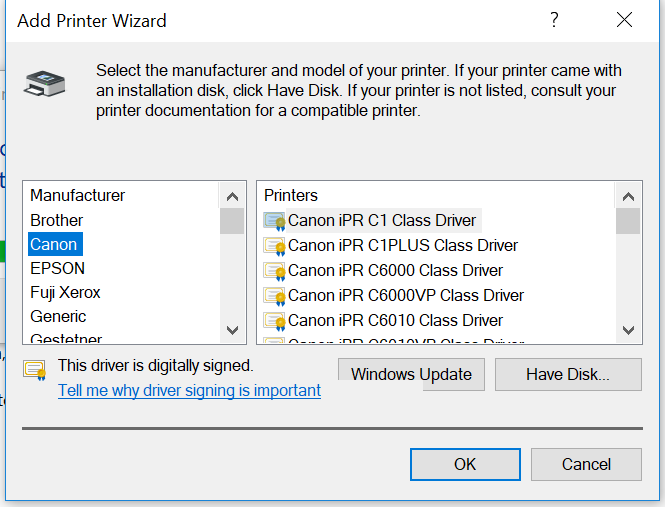
- The wizard will now ask you for a driver (this is where PS3 refers to the driver version and not the printer). Choose “Have Disk”
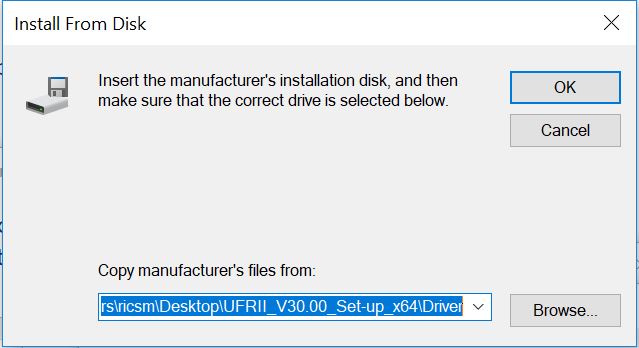
- When you click on the driver link, it will download to your drive, usually the downloads folder, however verify or select the disk drive (e.g C:\temp\canon) you want the files to be located as you will need to know this location to extract the requisite files. For example, if you extracted the drivers to C:\temp\canon then the drivers are located there:
32bit: C:\temp\canon\UFRII_V30.00_Set-up_x64\Driver
64bit: C:\temp\canon\UFRII_V30.00_Set-up_x64\Driver
NOTE: These locations are based on the default extraction location for the drivers above. Different versions may be in another location.
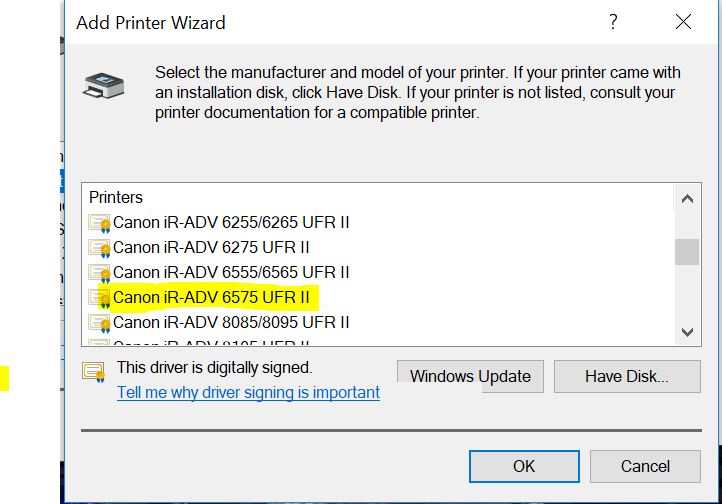
- Select the Canon iR-ADV 6575 UFR II driver
- NOTE: For Color Printers, select “Canon iR-ADV C5535/5540 UFR II”
- Success!
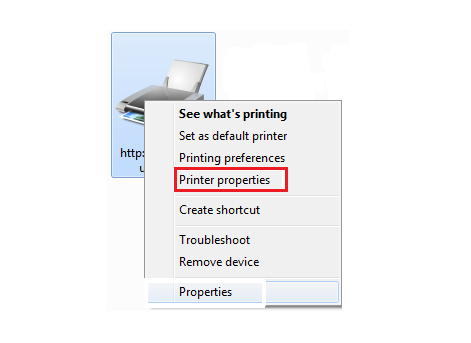
- Now to configure the printer properties. Right-click on the printer and select Printer Properties
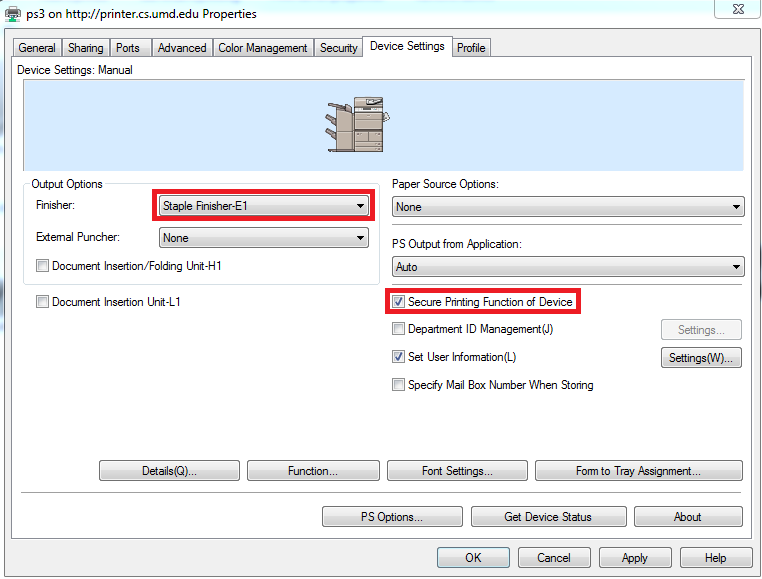
- Click on the Device Settings tab and change thes two settings:
- Click on Finisher and set it to Staple Finisher-E1
- Click on Secure Print Function of Device to enable the feature.
- Click OK and you are done.