Videoconferencing in Room 3450
Using the Access Grid equipment
Connecting a laptop to the projectors
Using the VGA cables on the front table, you can you can connect your laptop to any of the projectors in the room.
-
Connect the cable closest to you to your laptop. There are three cables, left, center and right.
-
If the Crestron console on the center table is black, touch the screen to activate it.
-
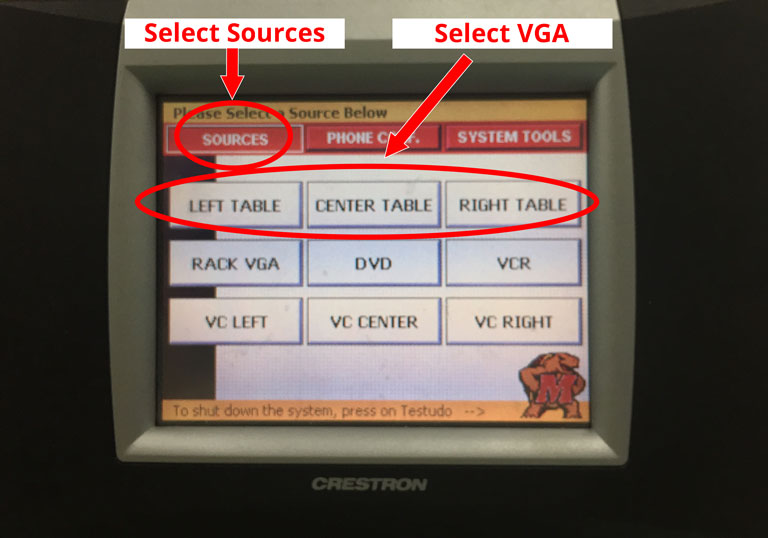
On the console, touch Sources
-
On the console, select the table source that corresponds to the cable you are using (Left, Center or Right.)
-
On the console, select the projector that you want to use to display your laptop’s output. (left projector, center projector or right projector).
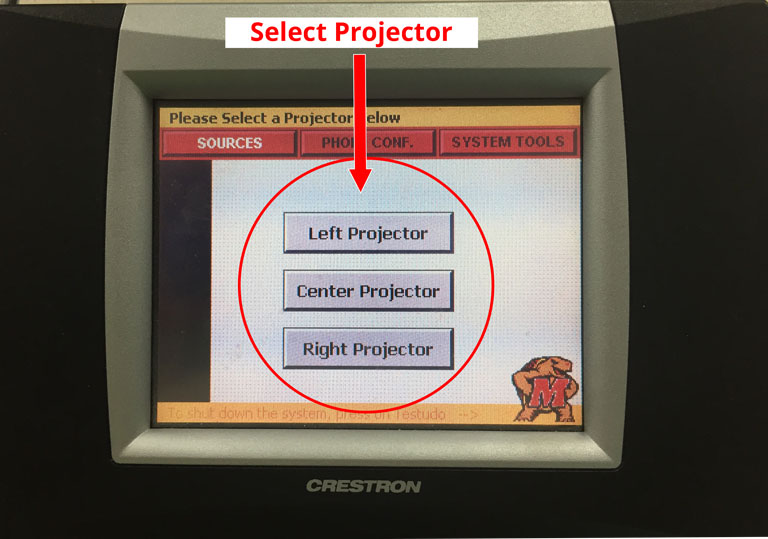
You may connect multiple laptops and associate each with its own projector.
Using the videoconferencing software
The first thing you would want to do is make sure the extended monitor (across the three projector screens) is set up correctly.
- Touch the console screen to activate it if it is black
- On the console, touch Sources
- On the console, touch VC Left, and choose Left Projector
- On the console, touch VC Center, and choose Center Projector
- On the console, touch VC Right, and choose Right Projector
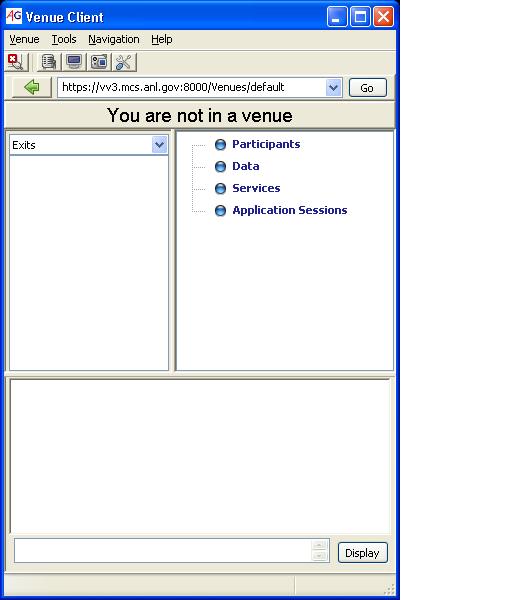
Now you can log into the machine. The username and password are posted on the room’s computer cabinet. The Access Grid application can be started by double clicking on the Access Grid 3 Venue Client icon located on the desktop. The four Access Grid cameras in the room should be set up automatically when you start the program.
-
From the Navigation menu, select University of Maryland. This will connect you to the University of Maryland venue.
-
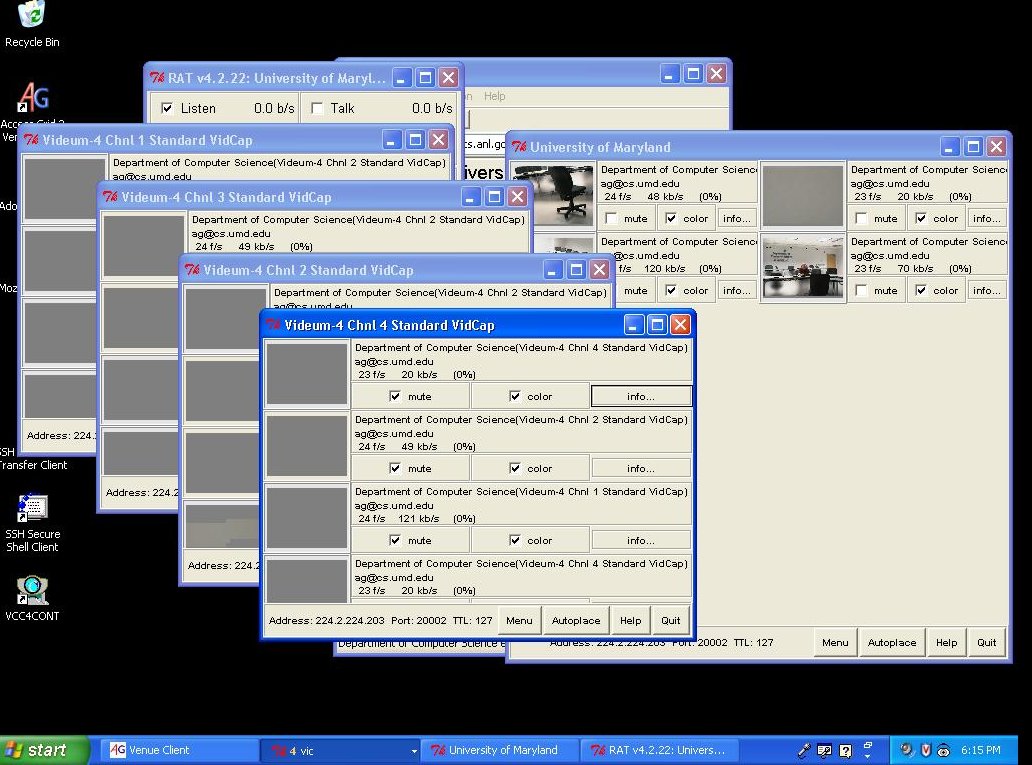
Six windows will appear on the screen (one for each camera, one containing the view from all cameras, and an audio detection window).
-
You will now be able to video-conference with everyone in the University of Maryland venue.
-
To quit, go to the Venue Client window and select Exit from the Venue Menu.
Shutting down the system
- Touch the Console screen located on the center table.
- Press the Univ. of MD turtle located in the bottom right hand corner.
- Say okay when asked if you’re sure you want to shutdown the system.
- This will turn off all the projectors in the room automatically.
Using Skype
Skype only works with the Logitech C930e cameras in the front of the room. It does not work with the four Access Grid cameras.
Using your own laptop
The Logitech C930e camera on the right (when facing the front of the room) is connected to a USB cable which comes out from below the desk in the front center position. Look for a USB connector which can be plugged into your laptop. If this cable is not long enough it can be extended a few more feet using a standard USB 2.0 extender.
Note that this camera is connected to a pair of USB-to-Ethernet adapters and that the whole setup is powered by the USB port in your laptop. It will drain your battery more than some webcam setups. Also note that the video lags a bit because of the ethernet conversion but the lag is not terrible.
Neither the camera nor the ethernet adapters should require drivers. Hopefully this setup will work with any laptop.
Using the computer in the room
The computer which controls the Access Grid setup is also connected to the Logitech C930e camera closest to it (on the left when facing the front of the room). If the Logitech camera is not set as the default in Skype then go to Tools->Options, then select “Video settings” from the left bar. On the Video settings page click on the dropdown near the top next to the words “Select webcam”. Pick the Logitech Webcam C930e and then click the “Save” button.
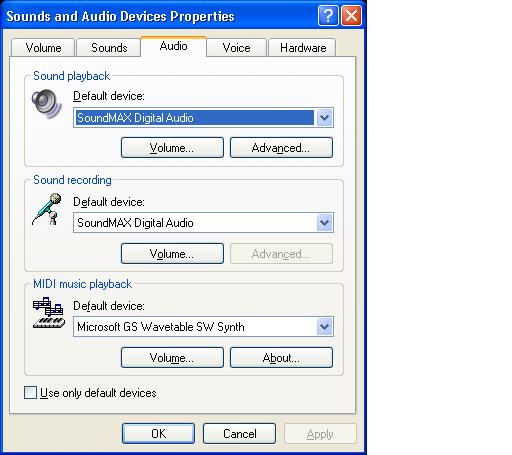
Because the computer resets its default recording setting to Microphone, the Sounds and Audio Devices control panel should also be opened when using Skype:
-
Go to the Start menu: Settings: Control Panels: Sound and Audio Devices. The following window will appear:
-
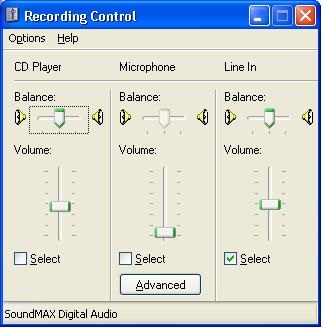
In the Sound recording section, click on the Volume… button. This image will appear…
-
Select the Line In on the right instead of Microphone.
-
Unfortunately, every time skype accepts or stops a call, or gets a message, this gets reset to the microphone. As a result you should keep this window open while using Skype.
Running Skype:
-
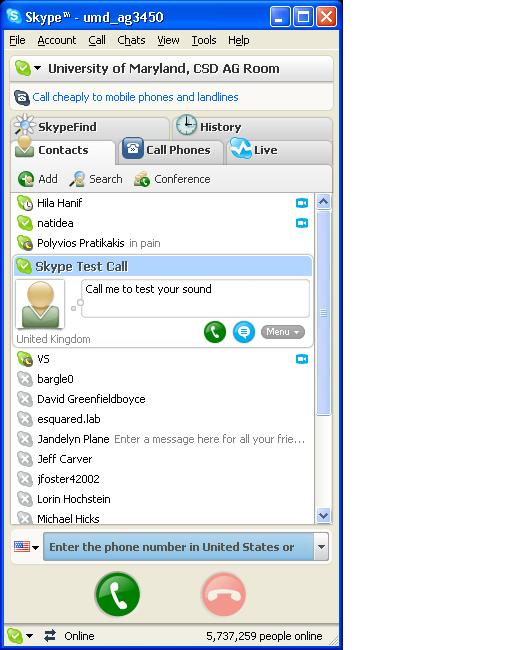
Double-click the blue Skype shortcut located on the desktop. This should automatically connect you to skype. (If a window appears asking for you to login, then use “umd_ag3450” as the username and the same password you used to login to the machine.) The Skype window will appear (seen below).
-
Click on the person you want to contact from the list of contacts or, to add a new contact, click the Add icon.
-
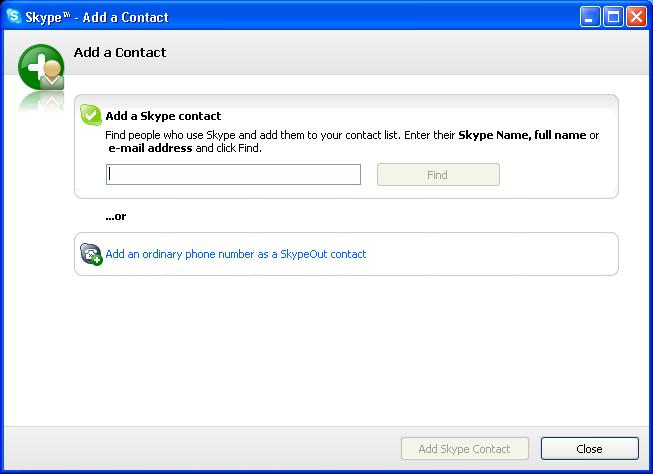
If you chose to add a new contact, you will get this window:
-
Enter the person’s identifying information (either email address or skype name) and Click the Close button.
-
Now you’re ready to make a call. Click on the green phone button. That’s all there is to it. You should hear Skype trying to connect to your contact.
-
Click the red hangup phone button to end the call.
-
To exit Skype, go to the File menu and choose Sign out
Traditional phone teleconferencing
The phone number for the room is 301-405-8099.
You can answer or dial the phone through the control console located on the center table. Remember to dial a 9 before trying to dial an outside number.