Setting Up Mail.app
These instructions are for OS X 10.9 and 10.10.
- If you have not yet created any e-mail accounts in Mail yet then just run Mac mail and skip to Step 6.
- If you already have one or more e-mail accounts in Mail then run Mail.app and from the Mail menu, select Preferences….
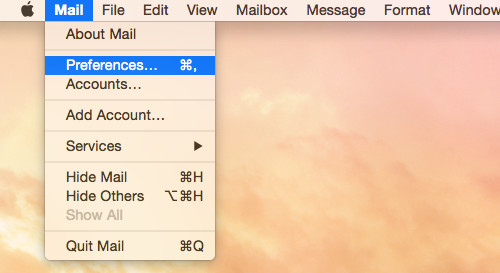
- In the Preferences window, click on the Accounts icon at the top.
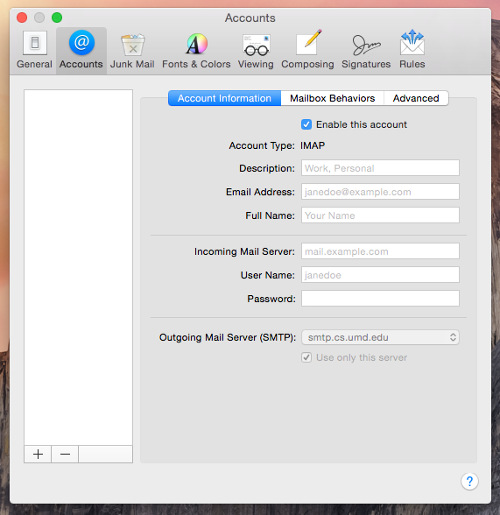
- In the Accounts window, click on the Account Information button. (see above)
- Now click the button in the lower left with a + sign on it. (see above)
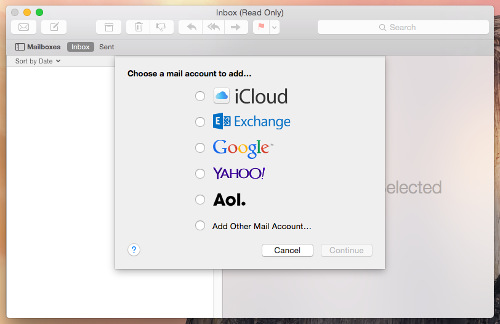
- You should now see the Choose a mail account to add… screen.
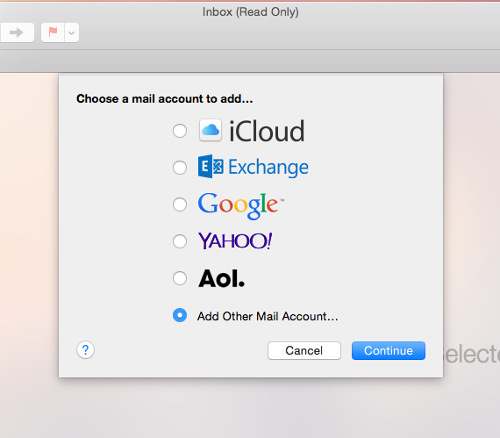
- Select the Add Other Mail Account… option and click the Continue button.
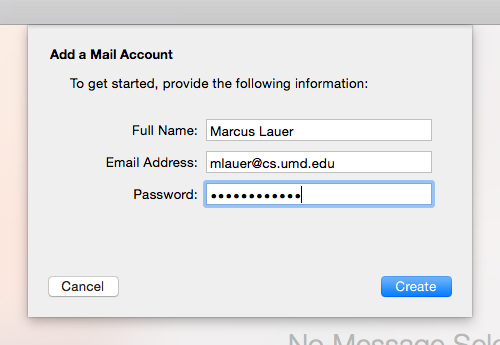
- Next you will see the Add A Mail Account window. Enter your name, e-mail
address, and e-mail password and click Create.
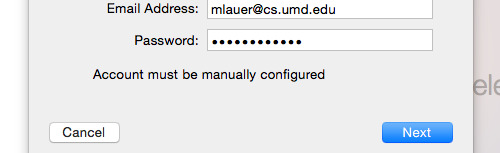
- This will result in the message “Account must be manually configured”. Click the Next button.
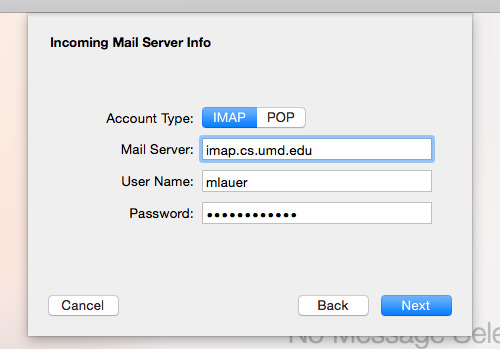
- In the Incoming Mail Server Info window enter imap.cs.umd.edu as the
Mail Server. Enter your own username and password as well and click Next.
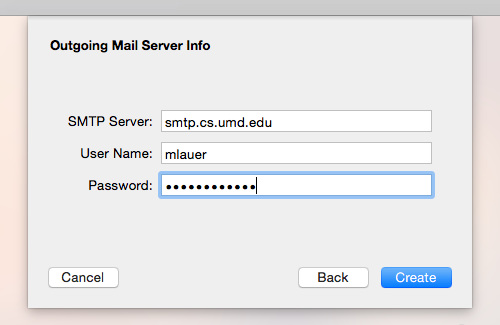
- In the Outgoing Mail Server Info window enter smtp.cs.umd.edu as the SMTP Server.
Again enter your own username and password as well and click Create.
- Once you have done this the Accounts window will appear again. Click on the
dropdown list called Outgoing Mail Server (SMTP) and select Edit SMTP Server List…
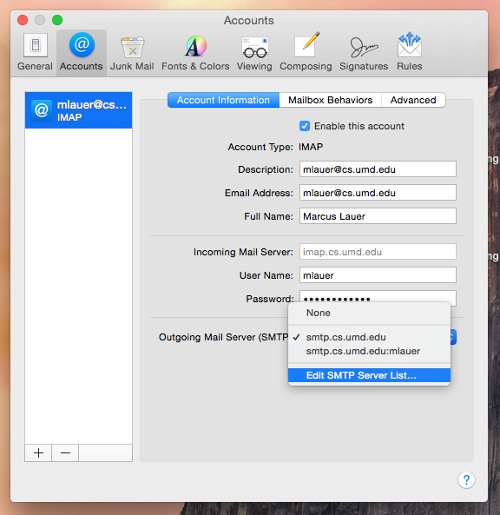
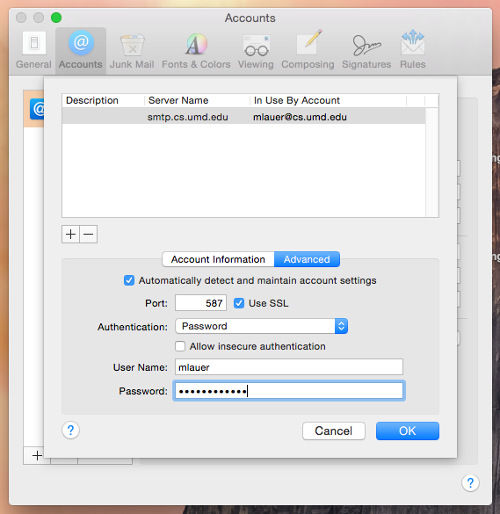
- In the SMTP Server List click the server you just created in the upper part of the window. It will be named smtp.cs.umd.edu.
- In the lower part of the window change the Port to 587. Also select Password
in the Authentication dropdown list. Then click OK.
- Close the Accounts window. You are finished setting up your IMAP client.