Mounting filesystems via SMB
Access to SAMBA is restricted to systems on the CS network. If you have a laptop on the wireless network or are connecting from some remote location, you will need to connect to the VPN
Mount your filesystem
-
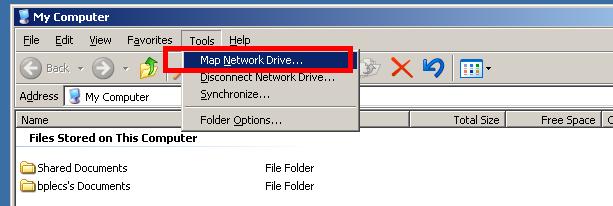
From the Windows file browser, click on Tools and select Map Network Drive.
-
In the Folder box, fill in the name of the samba server,
samba.cs.umd.eduand the path that you want to mount. In the example, we’re mounting the web directory, www, so the full path is\\samba.cs.umd.edu\www.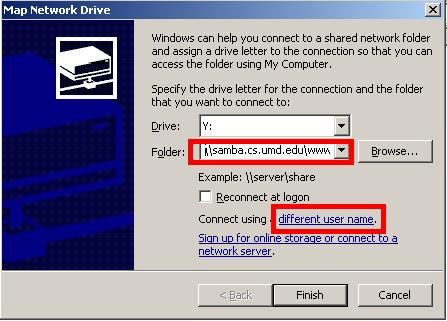
-
Click on the link that allows you to Connect using a different user name. In almost all cases, the default username will be incorrect. You should enter your username, prefaced by
umd-csd-nt, like so:umd-csd-nt\username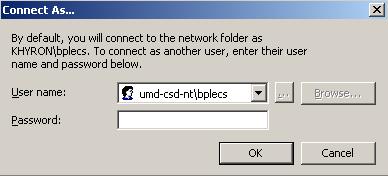
You do not need to enter your password at this time, you’ll be prompted for it when you initiate the connection.
- Click OK
- Click Finish
- When prompted for your username, enter your Department Windows password.
Verify that you are sending encrypted passwords
If you are unable to connect to SAMBA, you may be sending unencrypted passwords. Older department issued systems may be set to use this method.
Note: these screenshots are from Windows XP, but the process is basically the same on all versions of Windows. You can find
Local Security Policyin Windows 10 by typing it in the search box on the Start Menu.
-
Find the Administrative Tools folder (in Control Panel or the Start Menu) and open
Local Security Policy -
Under Security Settings, open
Local Policies -> Security Options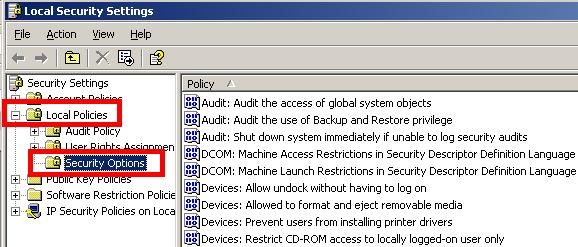
-
Scroll down to
Microsoft network client: Send unencrypted password to third-party SMB servers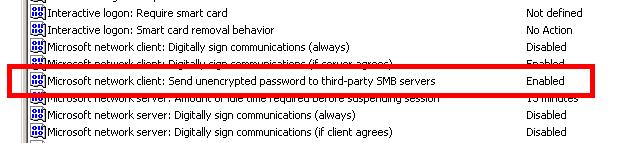
-
If the Security Setting of this option is
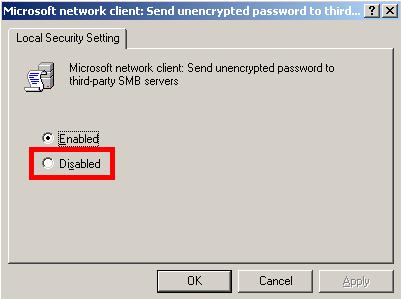
Disabled, then you already have the correct setting, you don’t need to do anything, you’re done. If this security option isEnabled, double-click it. -
Select the Disabled Radio button.
-
Click OK
-
If you have changed a security setting, you must reboot the system for the change to take effect.